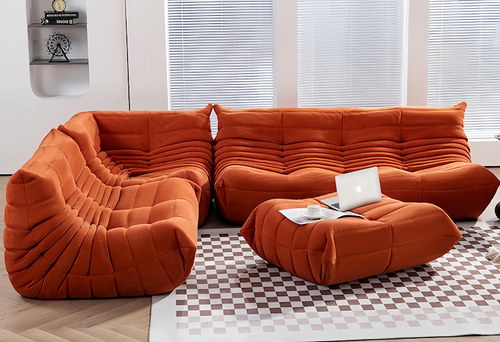
Have you ever thought about giving those old chairs a new life? Imagine doing a DIY chair reupholstery yourself and seeing an amazing chair makeover. This guide will show you every step to make your furniture look like it's been done by a pro.
Refreshing an old chair is not just about making it look better. It's about keeping its history alive and adding your own touch. You'll save money and add a personal touch to your home décor. We will guide you on choosing tools and fabric, so you can do this project with ease.

A step-by-step visual sequence of the chair reupholstering process, featuring a vintage chair with fabric being carefully removed, tools like a staple gun and scissors arranged neatly, colorful fabric swatches displayed nearby, and a work table with measuring tape and foam padding. The background shows a cozy workshop setting with natural light filtering in, highlighting the texture of the upholstery materials.
Key Takeaways
- Understanding the cost-benefit of DIY chair reupholsteringcompared to professional services.
- Learning about fabric types, from resistant poly blends to luxurious leathers, and how to choose a material with an appropriate Wyzenbeek rating.
- Insights into the types of tools required for a successful DIY reupholstery project.
- Exploring how sustainability factors into the decision to reupholster versus buying new.
- Realizing the potential for a more personalized and stylistically versatile home through the art of reupholstery.
- Tips for accurate measuring and fabric cutting to ensure a flawless fit for your revamped furniture.
- Appreciating the growth of the DIY community and the wealth of inspiration available from crafters all over the world.
Understanding the Reupholstery Process
Starting a DIY reupholstery guide helps give your old furniture a new life. It's key to know and follow important furniture reupholstery steps. This process is full of details and lets you customize with interesting chair upholstery techniques.
First, you take off the old upholstery from the chair. This step is crucial because you use the old material as a pattern for the new fabric. You need to pay close attention to how seams and welting are placed.
Did you know that one yard of fabric usually covers two standard dining chairs? This fact is handy when figuring out how much fabric you need. Always buy a bit extra, just in case.
If you want your chair to be more comfortable, consider adding more batting or foam. However, this might make your project more expensive. If you're doing a full makeover, you might also want to paint or stain the wood. Then, seal it with polyurethane for protection. Getting advice from store employees or using resources can help you pick the right materials and techniques. To keep your furniture looking good, using products like Scotchgard is a smart move.
You will need a few basic tools for this job. A flathead screwdriver, hammer, pliers, and butter knife are crucial for taking apart the old chair. The whole project, from start to finish, should take a newbie about half a day. The cost? Somewhere between $51 and $100. This effort is not only good for your wallet but also for the planet, as it gives furniture a longer life.
|
Durability Rating |
Usually 25,000 double-rubs for domestic fabrics |
|
Fabric Cost Range |
$51–100 |
|
Tools Required |
Flathead screwdriver, Hammer, Pliers, Butter knife |
|
Complexity Level |
Beginner |
|
Time Requirement |
Approximately half day (6 hours) |
|
Additional Recommendations |
Consider using Scotchgard for fabric protection |
Gathering the Essential Tools and Materials
Starting a DIY upholstery project takes skill, patience, and the right tools and materials. To make sure your project looks good and lasts, choosing quality DIY upholstery supplies is key. Planning carefully and collecting the right supplies from the start can make your reupholstery project easier and more successful.
Think about where you'll do your upholstery work. You need a big enough space for your furniture and all your tools and materials. Good lighting and a clean area help a lot, especially with complex fabric patterns and delicate sewing.
Here's a list of essentials for anyone wanting to start reupholstering furniture:
- Upholstery-weight fabric: It's important for making sure your reupholstered piece can handle daily use.
- A staple gun and air compressor: These are great for attaching fabric tightly to furniture frames.
- Various adhesives: This includes spray adhesives and fabric glue, which are helpful at different steps.
- Sewing and serging tools: You'll need a good sewing machine and serger for neat, strong seams and edges.
- Measuring and cutting tools: This means tape measures, scissors, and rotary cutters for precise cuts.
- Safety gear: Including eye protection and tough gloves, for safety.
Also, doing your homework on the specific DIY upholstery essential supplies needed for your furniture's design is wise. For instance, chairs with lots of details may need more specialized tools like tack strippers or upholstery regulators.
|
Tool |
Function |
Importance |
|
Staple Gun |
Secures fabric to frame |
Essential for all upholstery |
|
Fabric Scissors |
Precise cutting |
Crucial for accurate sizing |
|
Sewing Machine |
Stitches fabric pieces |
Ensures durability |
|
Air Compressor |
Powers staple gun |
Enhances efficiency |
|
Upholstery Needle |
Details and corners |
Necessary for fine work |
Preparing well with the right reupholstery materials and upholstery tools not only improves your work quality but also makes DIY fun. Every tool and material has a key role, from the first cut of fabric to the last precision work.
Disassembly and Fabric Removal Techniques
Starting to reupholster a chair means first taking it apart and removing the old fabric. This preps the chair for its new look and lets you check its structure. Whether it's a vintage piece or a newer item, the steps shared here will help. You'll learn how to strip down the chair without harming it.
Labeling and Organizing Components
The first step is to organize chair parts carefully. This makes putting it back together easier and ensures no piece gets lost. It's important to clearly label each part. For example, tag the seat, back, and arms with 'front', 'back', 'left', or 'right'. By doing so, every piece will return to where it belongs when it's time to reassemble.
|
Component |
Label |
Notes |
|
Seat |
Front Top |
Check for wear on the center edge |
|
Back |
Inner Lower |
Discoloration from long-term use |
|
Arm |
Left Side |
Previous slight damage noted |
|
Legs |
Right Rear |
Scratches at the base |
Photographic Documentation for Reference
Before starting, take pictures of your chair. These photos will serve as a guide during the reupholstery process. They help in remembering how the chair looked, including seam locations and fabric folds. This step is especially useful for aligning complex patterns or employing special upholstering methods.

A close-up shot of a vintage chair being disassembled, showcasing the intricate relationships between various components, such as staples, upholstery fabric, and padding. Tools like a staple remover, scissors, and a hammer are visible, surrounded by scattered fabric remnants. The setting is a well-lit workshop with wooden surfaces and hints of other reupholstery projects in the background.
Assessing and Repairing the Chair Frame
Before you start picking out new fabrics, there's a key step you shouldn't skip. It's checking and fixing the chair frame. The life and comfort of your chair depend a lot on its frame and support. In this part, we'll look at how to repair the chair frame, replace the chair batting, and fix the chair support structure.
Begin by examining the chair frame for wear or damage. Watch out for wobbly joints or breaks. A surprising fact is that many old chairs were put together using hide glue. Over time, this glue can weaken, highlighting the need for new adhesive or reapplication.
Then, turn your attention to the chair's batting. If it's falling apart, it's usually best to just replace it. This keeps the chair comfortable and well-shaped. Special tools might be needed to take off the old upholstery, in about half of the cases.
Don't forget to check and fix the chair's support structure. Look over the springs or webbing for wear. The chair's support structure is crucial for keeping it stable and comfortable. This step is essential for your chair's restoration.
Here's a reference table to help you understand some common measures and stats in chair repair:
|
Statistic |
Value |
|
Average foam thickness for reupholstering |
60mm |
|
Sanding involved in chair restoration |
Approximately 60% |
|
Diameter for repairing worn screw holes |
6mm |
|
Time required for applying new finish |
30 minutes |
|
Percentage of projects needing screw hole repair |
Approximately 25% |
Fixing up a chair frame does more than make it look good. It's about keeping it strong so it lasts longer. When you restore a chair right, it changes not just the chair but the feel of your space too.
Choosing the Right Fabric for Your Chair
The fabric choice is key in reupholstering furniture. It affects how your chair looks and lasts. You need to weigh aesthetic appeal against material durability. This helps you choose wisely.
Considering Durability and Style
Style catches your eye, but practicality adds lasting value. Natural fibers like cotton and wool look great but might not last as long. Synthetic fibers like polyester are tougher. They're better for chairs that see a lot of use. Think about how often the furniture will be used and if you have kids or pets before choosing.
Decoding the Wyzenbeek Rating
The Wyzenbeek rating measures how well a fabric can resist wear. It does this by rubbing the material against something abrasive a set number of times. Fabrics for homes should have at least 15,000 double rubs to be heavy-duty. If they have more, like 30,000 double rubs, they're even tougher.
Picking the right upholstery is more than just choosing colors. It requires understanding the fabric's qualities. Think about durability, how easy it is to clean, and how it looks. All these should fit the setting of your furniture.
For busy spots, consider using Olefin or acrylic. They resist stains and wear well. Fibreguard fabrics are also good, as they're easy to clean and resist stains. These choices are great for active homes.
The life and look of your redone chair greatly depend on the fabric you pick. With new fabric technology and treatments, you've got plenty of strong and stylish options. Whether you pick microfiber for softness or olefin for strength, make sure it matches your home and needs.
How to Reupholster a Chair
Starting a chair reupholstering project brings new life to furniture. It also adds your personal style to the décor. The key steps involve careful planning and doing the job right. This makes sure the chair looks good and lasts long.
Measuring and Cutting the New Fabric
The first step in reupholstering is to measure and cut the fabric correctly for your chair. Use the old upholstery as a guide to draw your new fabric pieces. Remember to mark the fabric with chalk for precision. This is especially important with patterned fabrics to ensure they align right.
Fabric widths vary, ranging from 54 to 72 inches. This variety helps fit different chair sizes and ensures a smooth cover without seams.
Before attaching the fabric to the chair, iron it. This step removes any wrinkles, helping achieve a polished, professional look.
Mastering the Stapling and Stretching Technique
A staple gun is crucial for attaching the fabric firmly to the frame. Begin stapling from the center and move outwards. This method keeps the fabric even and tight. Choose staples that are 1/4" to 1/2" in size, depending on the fabric and batting's thickness.
|
Supply |
Description |
|
Upholstery Stapler |
Tool for fastening fabric to furniture frames, can be pneumatic or spring-loaded. |
|
Fabric |
Usually heavy-duty type, over 12 oz per square yard; must be durable to withstand wear. |
|
Staples |
Ranging in size to match different thicknesses of material and batting. |
|
Safety Gear |
Includes goggles and gloves for protection while cutting and stapling. |
By following these steps carefully, you'll upgrade an old chair into something beautiful and functional. Use patience and focus on details. This way, you'll get results that look like they were done by a pro.
Adding the Finishing Touches with Welting and Trim
After you've reupholstered your chair with new fabric, it's time for the next step. You should create welting for upholstery and attach upholstery trim. Welting, also known as piping, gives your chair a polished look. It also strengthens the seams for both beauty and durability. Even though it sounds hard, the process is actually simple and leads to great results.
First, use the old trim to measure how much welting you need. Then, cut your fabric into strips at an angle. This lets the fabric bend easily around the chair’s edges. Wrap these strips around a cord to make the welting. Use a zipper foot on your sewing machine for closer stitches. Keep the seam allowance at 1/4 inch to make the welting tight and neat.
For attaching upholstery trim, you need certain tools and methods. You can use upholstery tack strips or a staple gun. Either way, you'll attach the welting neatly and securely to the chair’s edges. This is a key step. It keeps the welting from sagging and makes sure it highlights the chair’s shape well.
|
Upholstery Item |
Amount of Welting Needed |
Tools used |
|
Accent Chair |
Varies (20% more than current material) |
Zipper foot, staple gun |
|
Sofa |
Greater amount compared to chair |
Upholstery tack strips, heavy-duty stapler |
|
Ottoman |
Smaller amount compared to sofa |
Hand stapler, bread knives for trimming |
Adjust the space between marking lines on the fabric for different piping thicknesses. Thicker piping needs more space for a neat look. By creating welting for upholstery and attaching upholstery trim, you do more than just protect your chair. You make it a highlight of any room.
Reassembling Your Chair for a Polished Look
After you've upholstered your chair, putting it back together is the last step. This makes sure everything looks perfect and professional. You'll attach the new fabric securely and add a dust cover. This cover keeps the bottom of the chair clean from dust and dirt.
Securing the Upholstery and Final Adjustments
When you reassemble, every piece removed should go back in its place. It's important to tighten all screws and check the frame's sturdiness. The fabric needs to be carefully stretched across the frame to avoid wrinkles. Use different upholstering techniques for finishing.
- Ensure Symmetry: Check that the fabric pattern aligns symmetrically across the chair.
- Fasten Securely: Use a heavy-duty staple gun to secure the fabric onto the frame. Make sure every staple is tight.
- Trim Excess: Cut off any extra fabric to keep things looking tidy.
Replacing old hardware with new, shiny pieces strengthens the chair and enhances its look.
Creating a Professional Dust Cover Finish
Adding a dust cover is the final step in chair reassembly. It has both practical and aesthetic functions. It keeps the chair's inside parts clean and makes the chair look neat.
Use a piece of black, breathable fabric for the cover. Cut it to fully cover the chair's underside. Then, pin and staple the cover, making sure it's tight and fits the chair's shape well. This stops dust from gathering and helps the chair last longer.
This reassembly process not only fixes the upholstery in place. It also makes sure the chair remains useful and looks stylish. Following these steps will give you a professionally upholstered look, bringing elegance to any room.
Upcycling and Design Inspiration Beyond Reupholstery
Starting DIY furniture projects does more than make your home look beautiful. It gives old pieces a second chance and helps save resources. You also get to make your space truly yours. Beyond basic reupholstery, upcycling ideas can turn furniture into special, useful art. You can paint old finds or add temporary touches with adhesives. The choices are endless and good for our planet.
Want to decorate your home creatively and sustainably? Try these upcycling tips. First, use parts from broken furniture to cut down on waste. This is not only eco-friendly but also saves money. Check out some interesting facts:
|
Aspects |
Data |
|
Success Rate of Salvaged Chairs |
66.67% |
|
Cost of Upcycling |
Under $30 |
|
Lifespan Extension |
At least 5 years |
|
Environmental Impact |
Reduced material waste |
Adding functional and stylish pieces doesn't have to break the bank. With a 66.67% success rate for fixing chairs and costs under $30, these upcycling ideas prove you can create valuable items from old ones.
For more home decor inspiration, think about fabric types. Choose durable and stylish options like faux leather or high-rub count fabrics. For instance, a three-seater sofa might need 12m – 16m of fabric, depending on its style. This shows upholstery's power to change a piece and its sustainable and beautiful benefits.

A cozy living room scene featuring creatively upcycled furniture projects, including a reupholstered chair with vibrant fabric, a rustic coffee table made from reclaimed wood, and a colorful pouf made from woven materials, surrounded by houseplants and soft lighting.
In conclusion, upcycling goes beyond just reupholstery. Many creative DIY furniture projects await you. From simple paint jobs to using bold fabrics, these projects let you express yourself. They also demonstrate a commitment to living sustainably.
Conclusion
Starting a DIY reupholstery project is incredibly rewarding. It brings a feeling of accomplishment and boosts creativity. Through this guide, you've learned about reupholstering chairs and more. Whether you wanted to save money or revamp an old treasure, you now have the skills. These skills ensure your chairs are both beautiful and sturdy.
Reupholstering a chair costs between $50-$200 and takes about an hour. This makes the project both affordable and doable. You've learned how to pick the right fabric and cut it correctly. Choices like fade-resistant materials ensure your chair stands out. Remember, the right texture, pattern, and colors make your chair timeless. Adding Dacron polyester batting and a black cambric fabric dust cover adds the perfect touch.
Reupholstering furniture is also good for the planet. It reduces waste and keeps furniture in use longer. This craft shows respect for materials like silk, linen, and leather. Now, grab your staple gun and use your new skills. Your reupholstery project shows your commitment to doing it yourself. Plus, it helps keep beautiful, upholstered furniture in our lives longer.
By following this DIY guide, you should now have the confidence to reupholster your corner chair like a pro. Purchasing a corner chair for the bedroom not only enhances your space but also adds a personalized touch to your home. Keep exploring more DIY projects to make your living space uniquely yours!
FAQ
What are the basic tools I need for DIY chair reupholstering?
You'll need needle-nose pliers, a staple gun, and scissors. Don't forget a sewing machine, a flathead screwdriver. You might also use upholstery tacks or nailhead trim for extra flair.
How do I ensure I purchase enough fabric for my chair makeover?
Start by taking off the old fabric to measure it. Add extra for any mistakes or if the design repeats. Bring these measurements when you go fabric shopping.
What is the purpose of photographing my chair before disassembling it?
Photos of your chair before you start working are like a guide. They help you remember how everything was attached and how it looked originally.
When should I replace the batting on my chair?
Change the batting if it looks worn out, discolored, or just to make the chair comfier. Do this step after taking the chair apart but before you put on new fabric.
What should I consider when selecting upholstery fabric?
Consider durability along with style for your fabric choice. Go for fabrics that are strong against mildew and sun damage. Avoid weak fabrics if you have kids or pets. Also, check the fabric's Wyzenbeek rating to measure durability.
What are the steps for correctly cutting and attaching new upholstery fabric?
Put the old fabric pieces on the back side of your new fabric. Pin them in place and allow extra room on the edges. Then, mark the cutting lines with chalk. Sew the pieces together, then stretch and staple them onto your chair.
What is welting, and why is it important in reupholstery?
Welting is a cord covered with fabric that goes along the edges of upholstery. It makes the piece look finished and strong at the seams. Welting highlights the shape of the chair, adding to its beauty.
How can I achieve a professional look when finishing my reupholstered chair?
To get that expert look, pull the fabric tight and staple it evenly. Add welting for neat edges. Finally, a dust cover on the bottom will give it a sleek, finished look.
Are there any DIY projects I can take on after mastering reupholstery?
With reupholstery skills, try painting furniture next. You might also add wallpaper to the back of shelving or cabinets. Or, try peel-and-stick decorations for an easy style update without a big commitment.
How do I know if I've successfully reupholstered my chair?
Your chair is successfully reupholstered if it feels comfy, looks neat without any loose fabric or wrinkles, and either matches or looks better than the original design.


