
Wall lights are a versatile solution to a variety of interior lighting needs. They can provide a subtle ambient glow or serve as accent lighting to highlight artwork or architectural features.
Before working on a light fixture, it is important to turn off the power to it at the circuit breaker. This will prevent injury from accidental shock or fire hazards.
Placement
The positioning of your new wall lights will be determined by your personal preference and the layout of your home. Having said that, there are a few guidelines you can follow to get you started.
Start by laying down and marking an area on the wall that you want your first fixture to go in. This will give you a good indication of how high to hang it. It's a good idea to use a level and chalk line to mark out your measurements to avoid any potential issues when it comes to drilling into the drywall.
Once you have decided on the location of your first fixture, it's a good idea to live with it for a day or so before you install it. This will give you a better feel for the positioning of your fixtures and ensure that they are positioned at a comfortable height when you're sitting or standing in the room.
The next step is to locate the existing power cables, turn off your breaker, and then turn on an electrical tester. This will confirm that no current is running through the wires in the box. If it does light up, that means the cable is a constant-live one, and you will need to choose a non-switched option. If there is a switch cable, it may require the removal of the old ceiling fixture, and then you will need to strip back the plastic to expose the black and blue wires. If there is an earthed/grounded wire (yellow or green), then this should also be stripped.
Materials
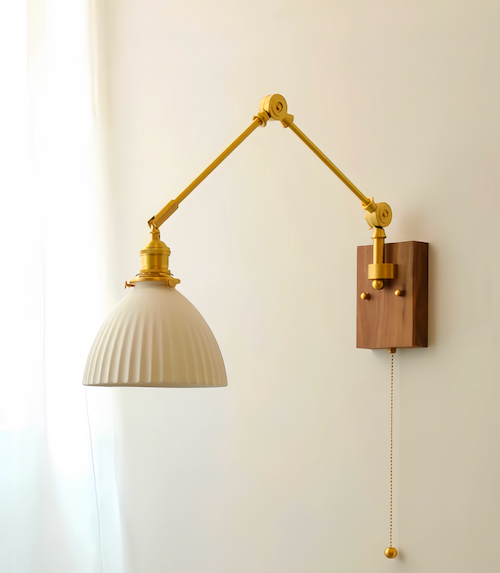
Wall-mounted (or sconce) lights are an elegant way to add lighting to any room. They provide indirect light, reduce glare, and illuminate surfaces that would otherwise be hard to see. They also save floor and table space, which is a plus in smaller homes or apartments.
When installing sconce lights, it's important to have the right materials for the job. This includes the actual fixtures, the light bulbs, and any mounting hardware. In addition, you'll need tools to complete the project, including wire strippers and a wire nut set.
Before starting to install the sconce, make sure that the electricity is turned off at the breaker box. Identify the black and white wires, and if your fixture has a grounding wire, locate that too.
Once you've found the existing electrical connections, remove the old fixture by unscrewing it from the sconce box and removing any screws from the back of the fixture. If the sconce has a glass shade, carefully remove it by holding the lamp with one hand and using your other hand to unscrew the rim of the shade from the socket.
Wiring
Before you can install a wall light, you must make sure that all of the wiring in the area is turned off. You can do this by turning off the circuit breaker that controls that area of the house. Turning off the switch that controls the current fixture will also work, but it is best to turn off both. If you do not do this, there is a chance that someone will accidentally switch the light back on and get electrocuted.
Once you have done this, it is time to start the actual installation. First, screw the new mounting bracket onto the electrical box (if it came with one). Next, run a length of 14/2 wire from the existing power source to the sconces. You can do this either with fish tape or by cutting a hole in the wall and sliding the cable through it. Then, plug in the sconce. You can usually find a label on the back of the box that shows which wire is which.
Some older fixtures will have two or three openings in the electrical box. These will typically be the black and blue wires, or a third wire if the lighting is earthed/grounded, which will be yellow-green. Once you have plugged in your wall light, you can screw a cover over the box to hide it from view.
Installation
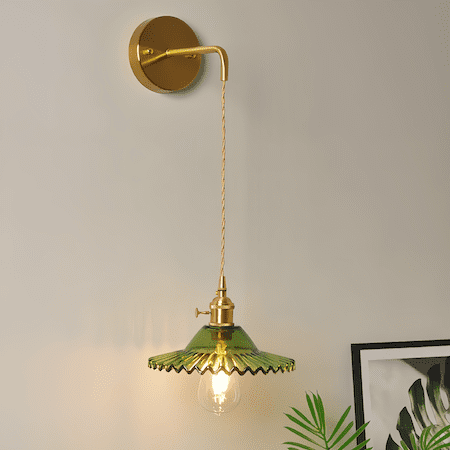
If you’re looking for a way to add some extra light to an area of your home, wall lights are the perfect solution. They can be a decorative addition to any room, and they come in all shapes and sizes. However, there are some things to consider before you decide on the style and number of wall lights that will be right for your space.
First, you need to determine the purpose of your wall light and what kind of lighting it will provide. This will help narrow down your choices and ensure that you’re installing the perfect fixture for your needs. For example, you’ll want to avoid overcrowding your walls with too many lights, as this can make the space look cluttered. It’s also important to choose the correct wall light type, as different fixtures emit different amounts of light and can affect the overall atmosphere in a space.
If you’re replacing an existing ceiling light with a wall sconce, turn off the power to the old fixture at your circuit breaker box before removing it. Once you have the old light removed, carefully remove any glass shades or other decorative elements. Next, use wire strippers to remove the protective coating from the wiring connections, and splice the black and white wires together with appropriate-sized wire nuts.